

If you’re an avid Apple user, you’re likely aware of the importance of iCloud storage. It’s the backbone of the Apple ecosystem, providing secure and convenient storage for your photos, videos, documents, and more. But do you truly know what it can offer?
What is iCloud?
iCloud is Apple’s cloud storage service that allows you to back up, synchronize, and access your data from any Apple device. This includes features like automatic photo backups, contact synchronization, and document storage in Apple’s Cloud space
Why Get More iCloud Storage?
Over time, the amount of data we generate increases—be it high-resolution photos, 4K videos, or space-consuming apps. Having sufficient iCloud storage ensures your data is always accessible and secure, without worrying about running out of space.
Key iCloud Features
1.Automatic Backup
ICloud automatically backs up your photos, videos, app settings, and messages, ensuring nothing is lost, even if you lose or change your device.
2.Family Sharing
Storage space can be shared among family members, allowing everyone to benefit from the storage without compromising privacy.
3.Universal Access
Whether you’re using an iPhone, iPad, Mac, or even a PC, iCloud ensures universal access to your files, creating a seamless user experience.
How to Purchase More iCloud Storage with Your Neero Virtual Visa Card
Now, let’s go through the simple steps to expand your iCloud storage using a virtual Visa card.
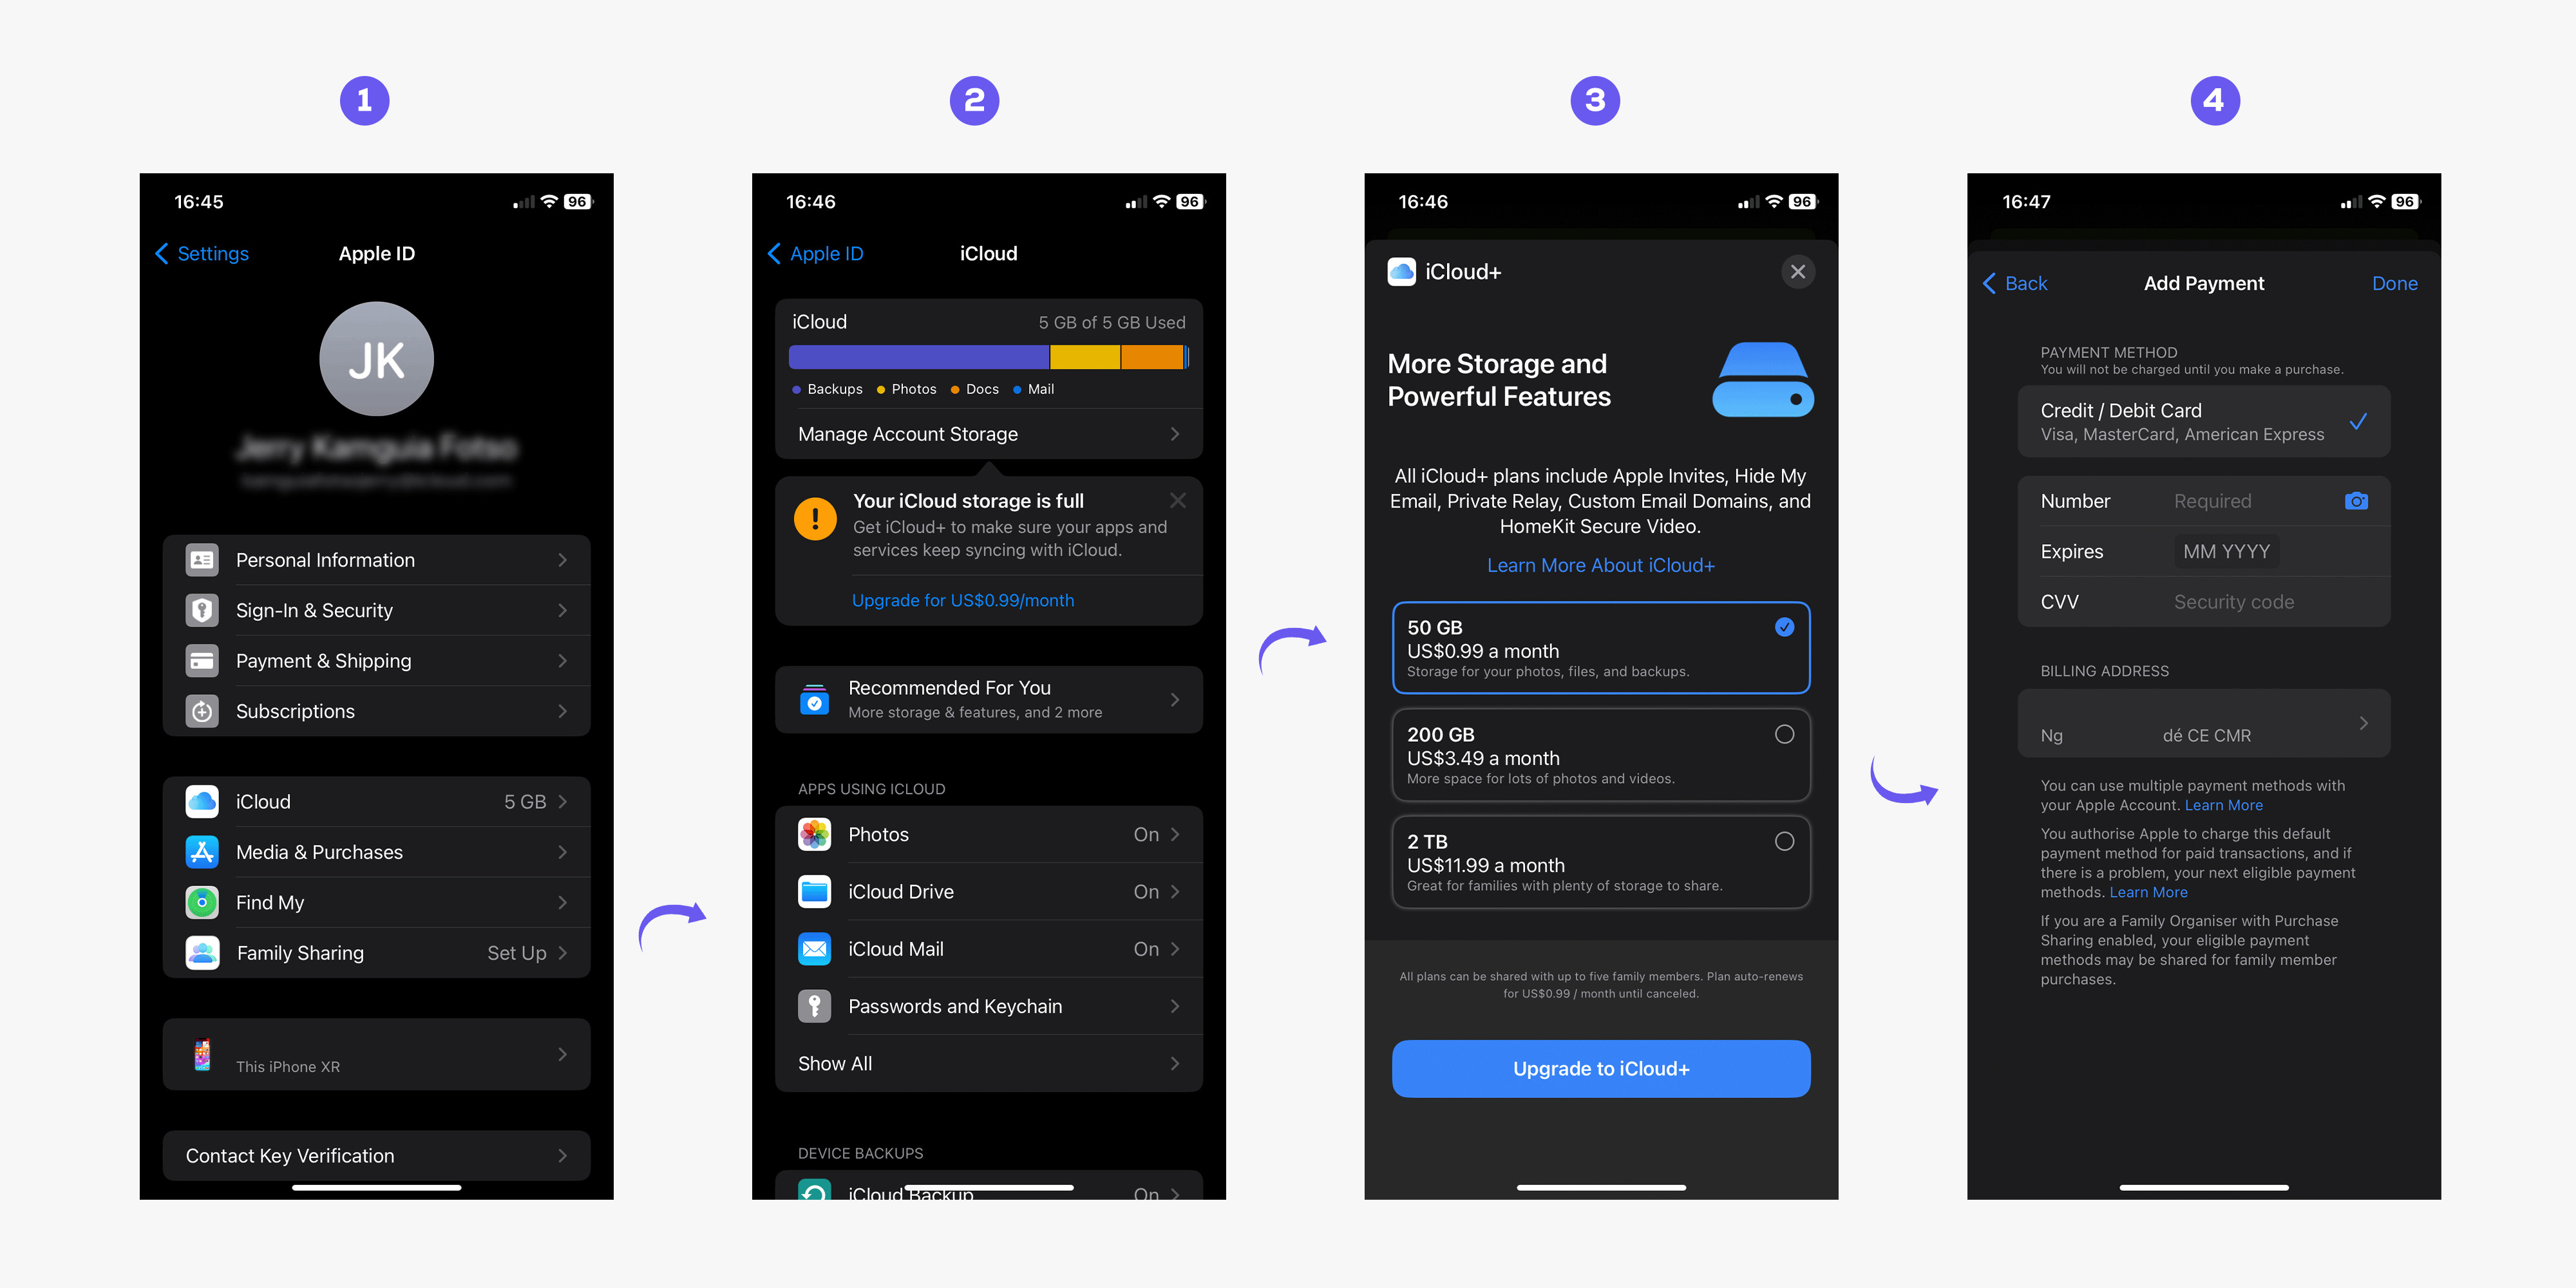
1. Access iCloud Settings
On your Apple device, open « Settings » and tap on your name at the top. Then select « iCloud. »
2. Manage Storage
Within the iCloud section, choose « Manage Account Storage. » You’ll see a list of apps using your storage.
3. Select « Change Storage Plan »
Find the « Change Storage Plan » option. Tap it to view available plans.
4. Choose Your Plan
Select the plan that best suits your needs. You can choose from various options based on the amount of space you require.
5. Use Your Virtual Visa Card
When you’re ready to make the purchase, choose « Pay Now » and follow the on-screen instructions. Add your virtual Visa card as the payment method and complete the transaction.
Now that you know how to upgrade your iCloud storage with Neero, discover how to add your XAF card to Apple and unlock even more services.


Leave a comment